What are custom groups and how can I create them?
 Only district level managers can create a custom group. School site managers can add and remove users to/from a custom group - but only users that are in their school group.
While teachers can create classes to group their students together, it can be be beneficial to create custom groups to view a larger set of students at the school level (ie. all the SpEd Students or Tier 2/Tier 3).
Create a Custom Group
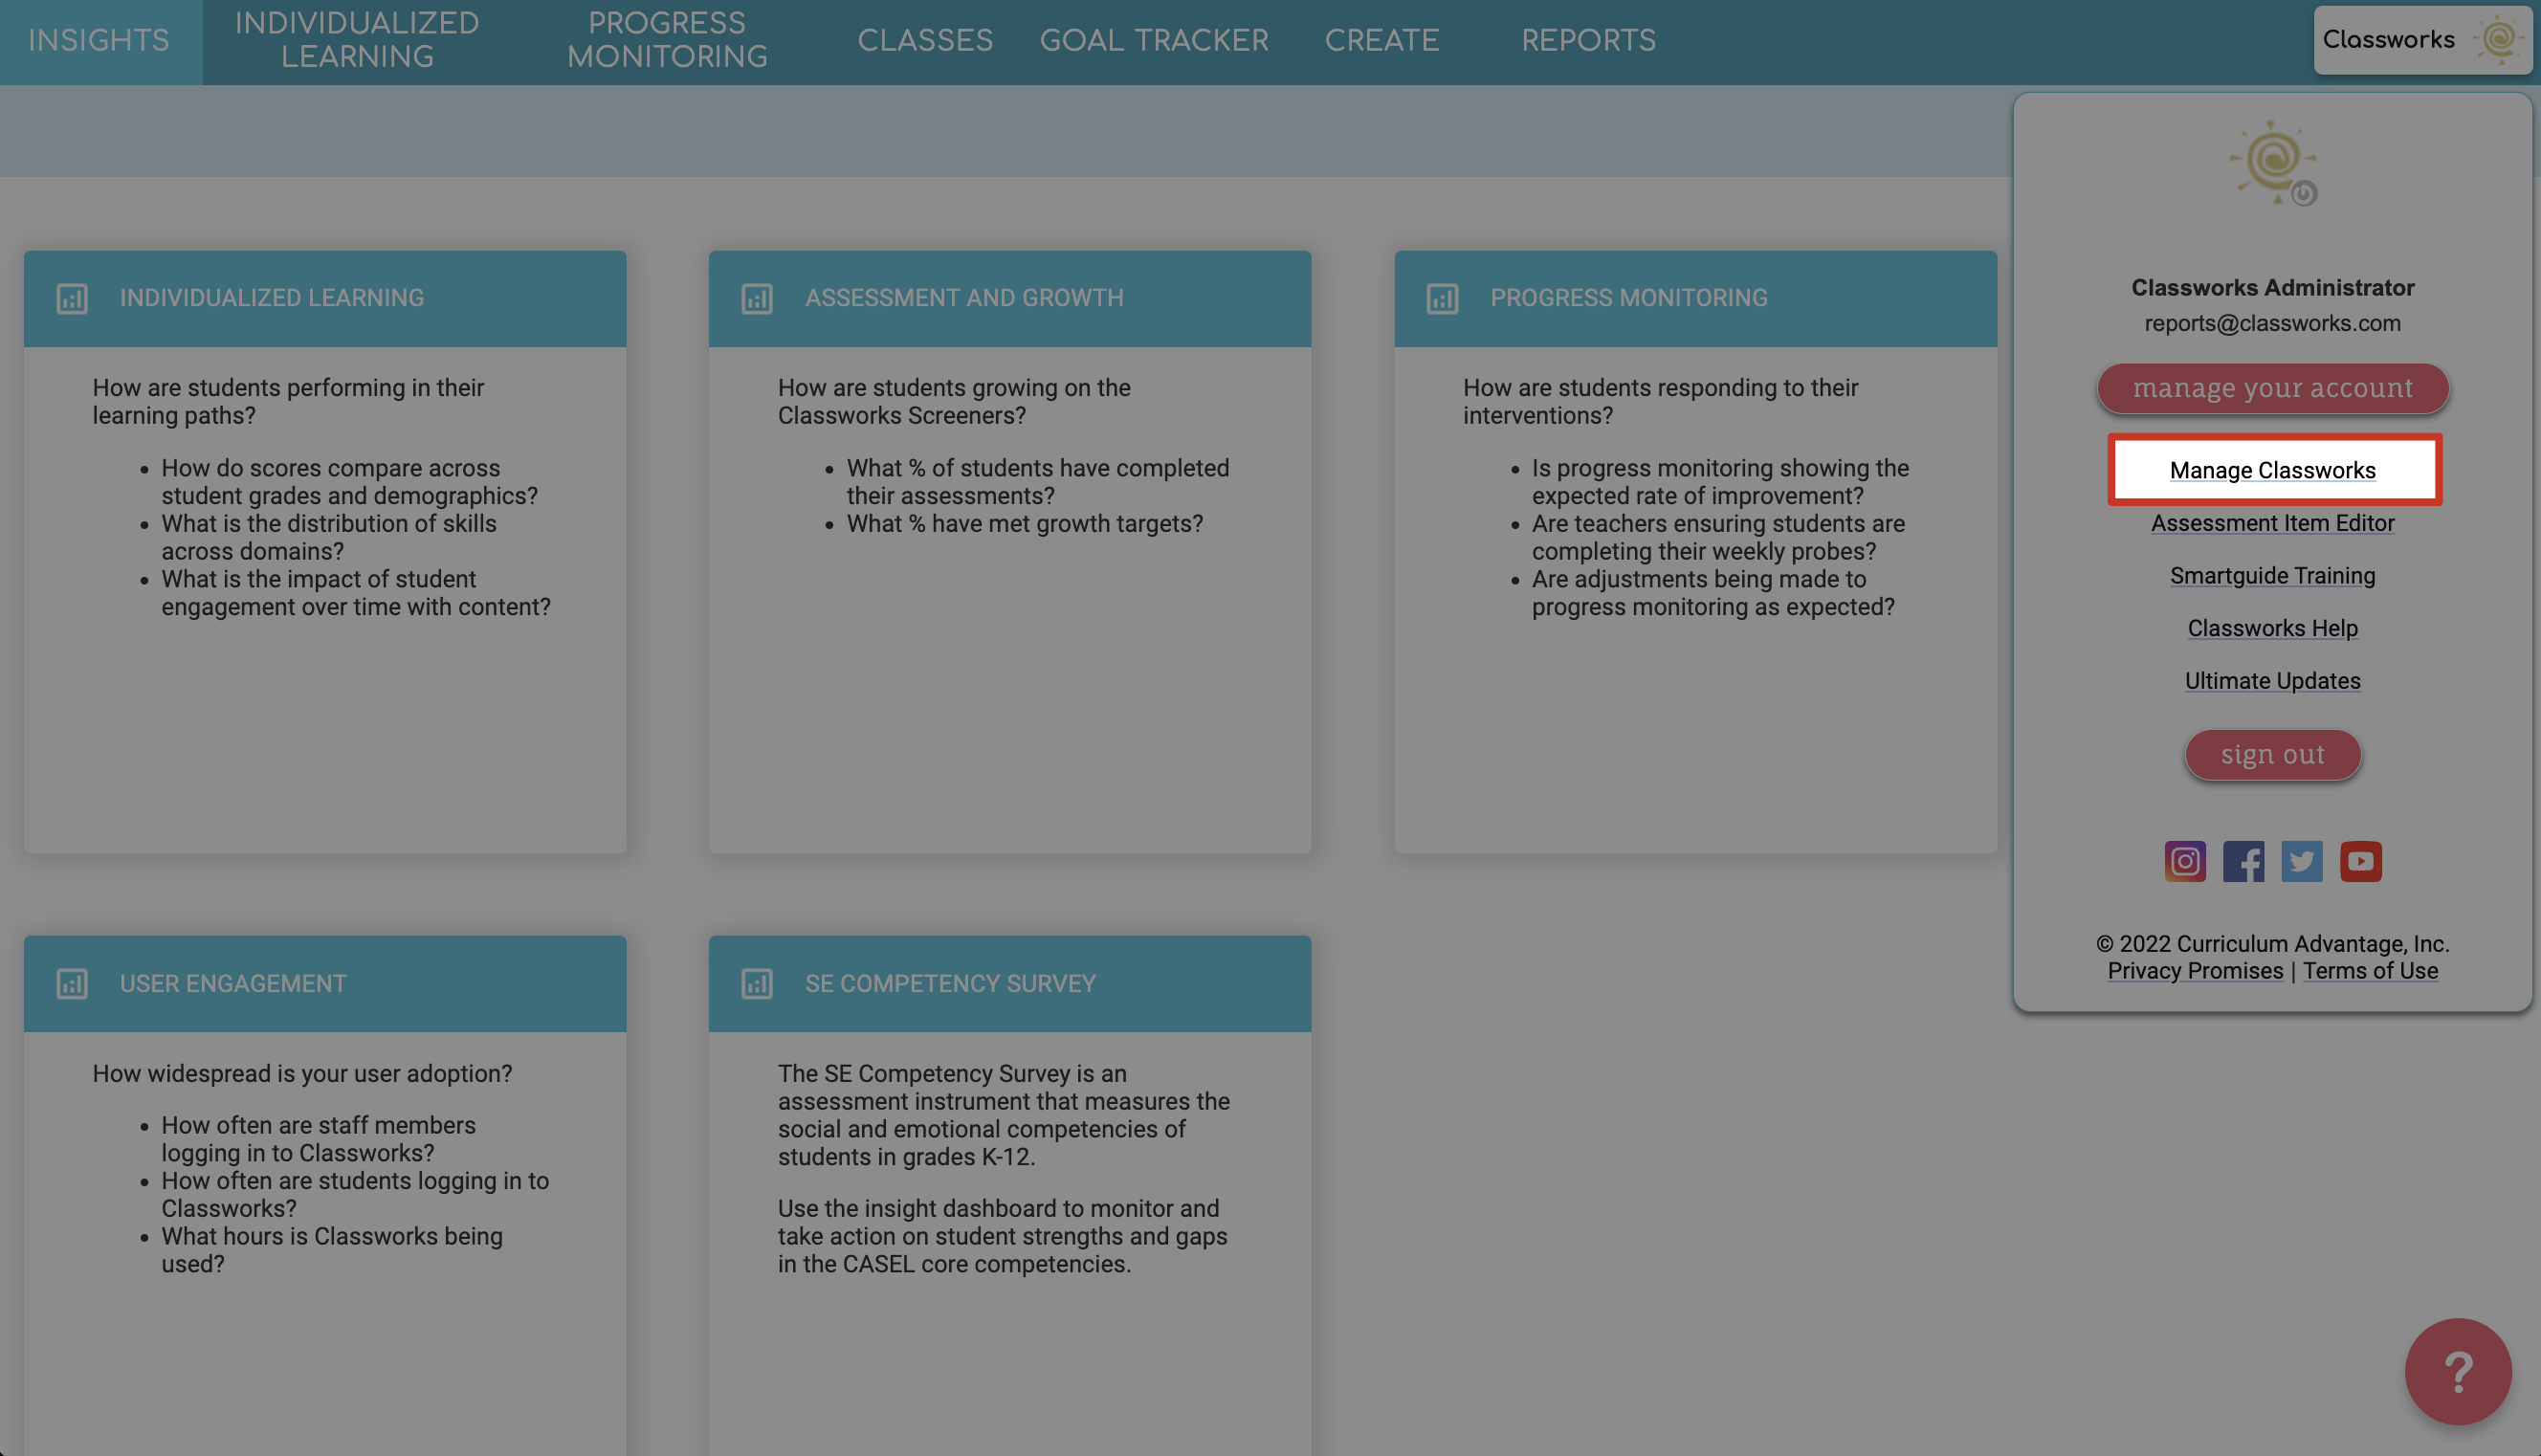
1. Click your name in the top right then click Manage Classworks.
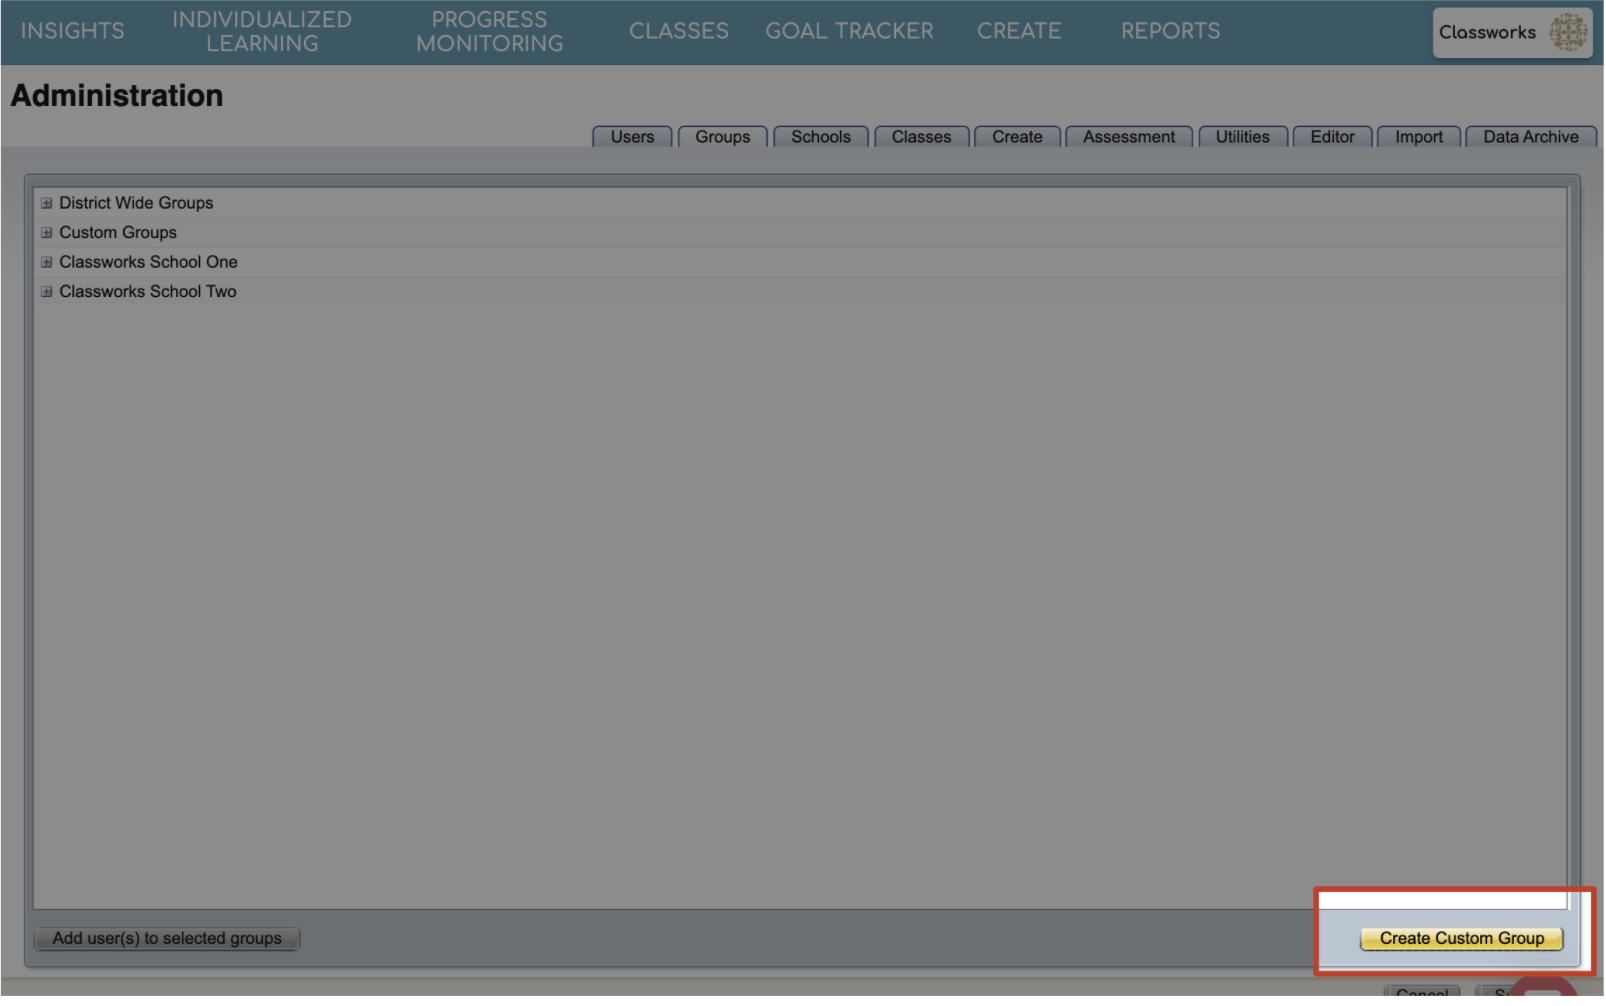
Click on the Groups sub-tab.

2. Click on the Create Custom Group button.
3. Enter the name of the custom group in the Group Name box.
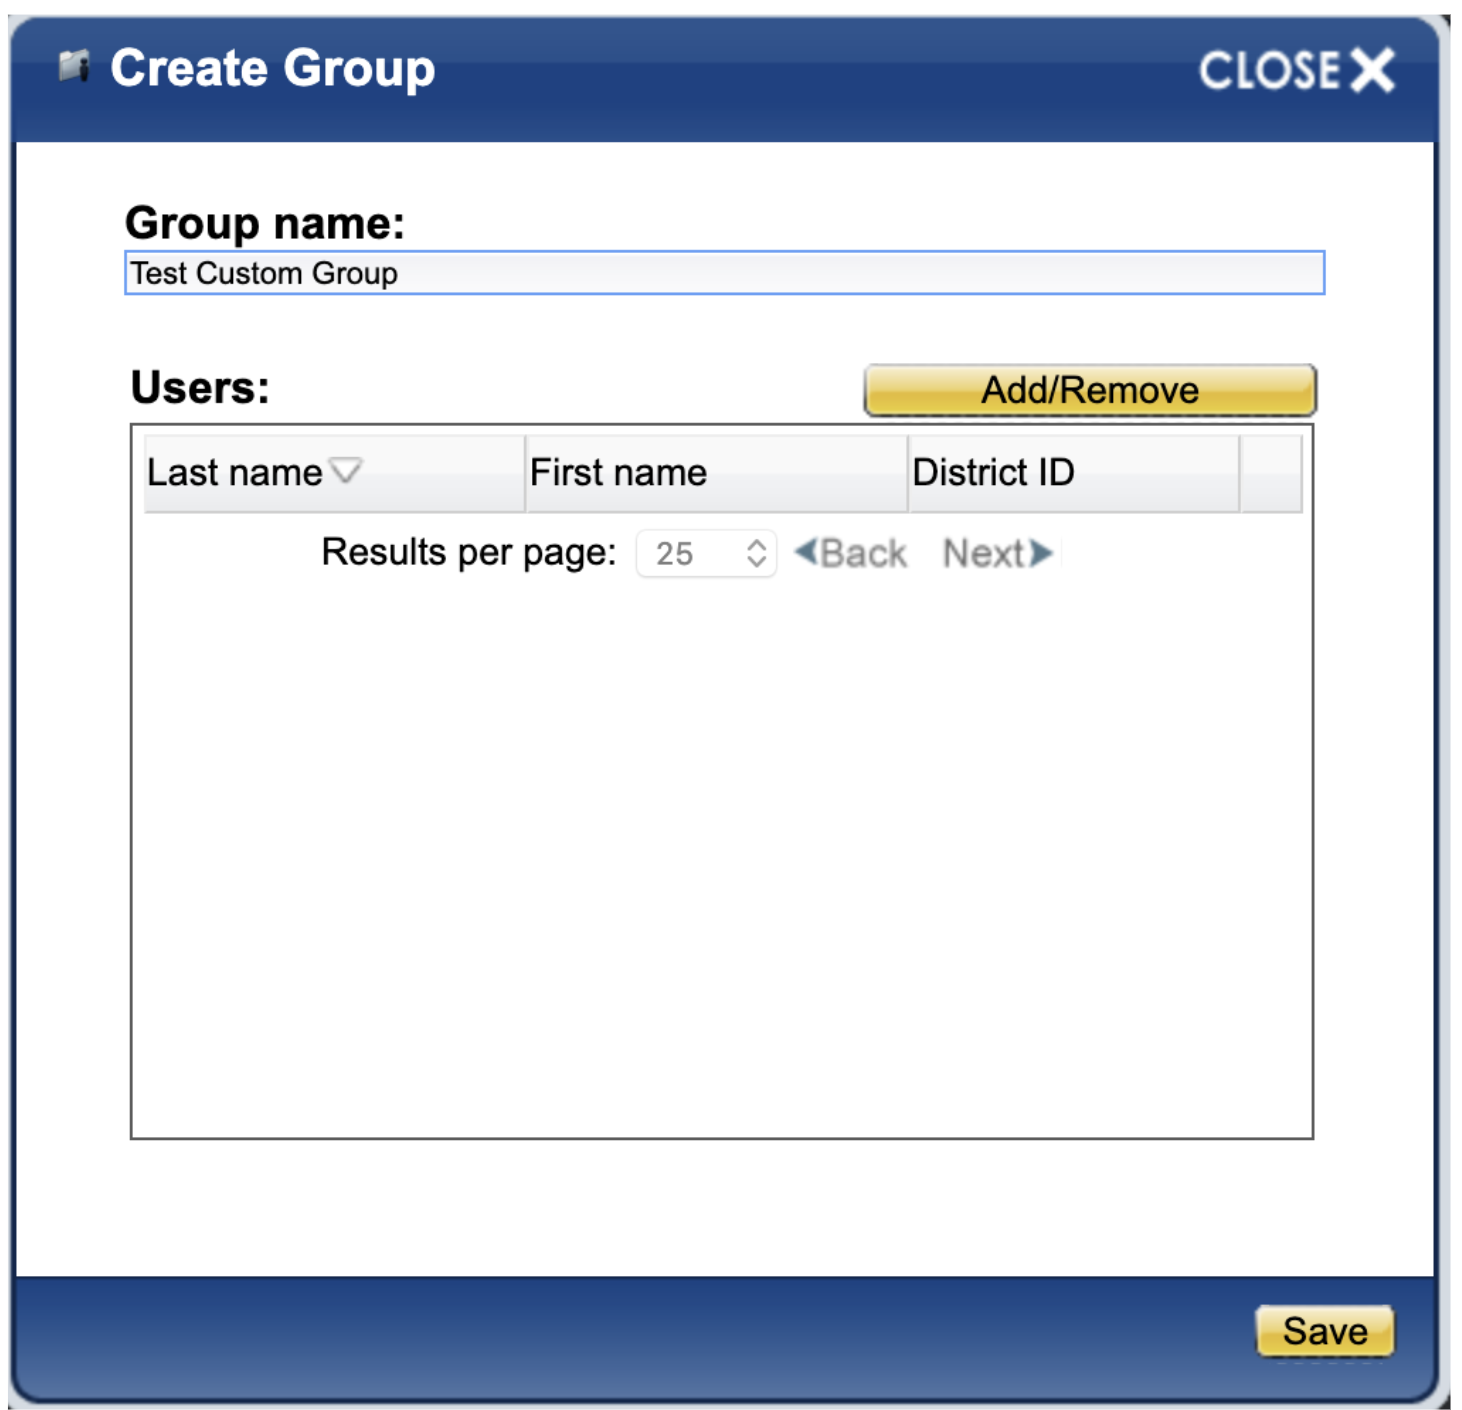
Follow steps 4-10 below to add students to the custom group.
4. Click the Add/Remove button.

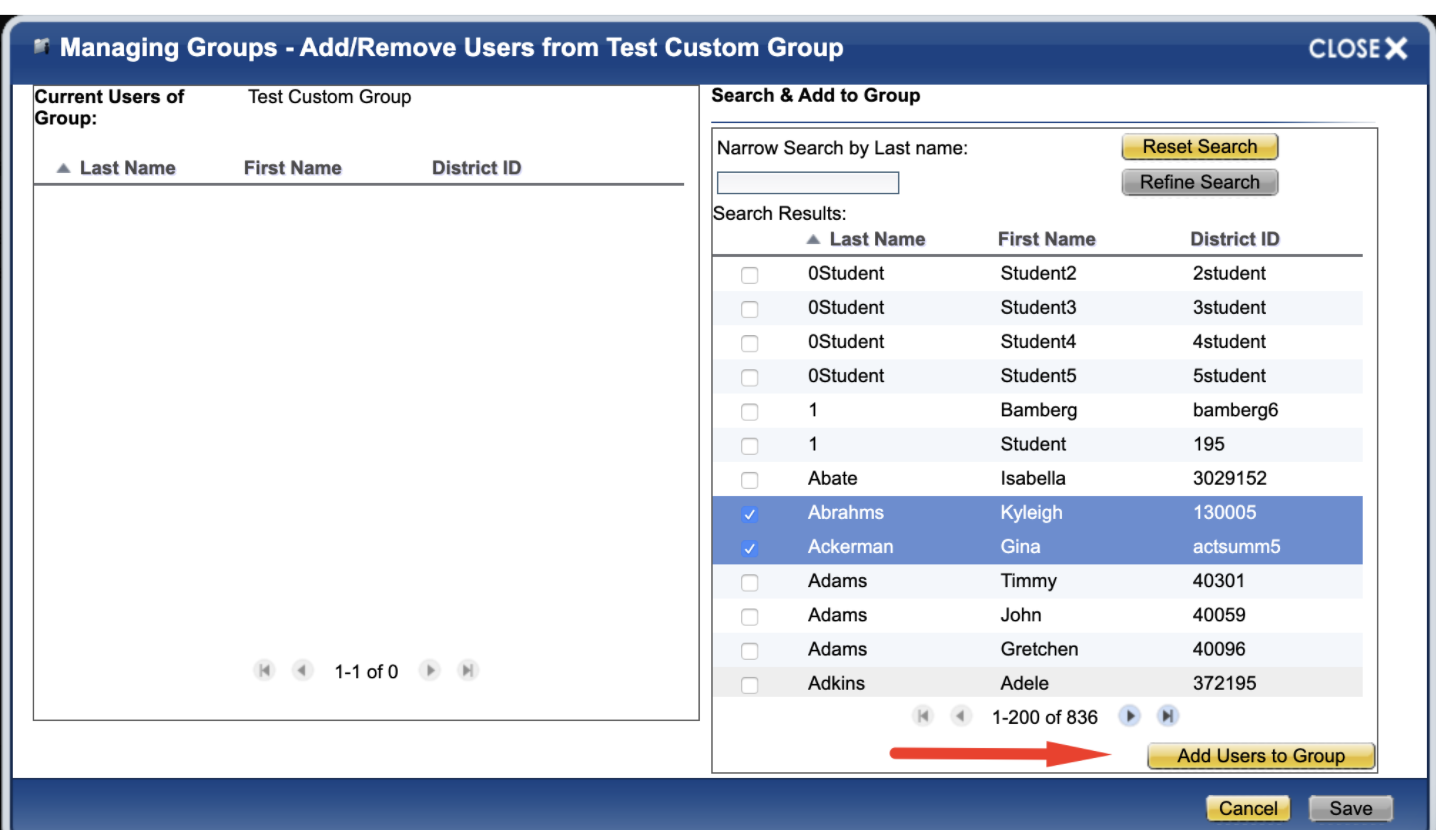
5. Search for users to add to the custom group.
On the right-hand side of the screen, enter your search criteria and click Search.

Search criteria include:
-
Search within the user's current school group
-
Search by user last name
-
Search by grade level
-
Search by demographic
6. Select the users for the custom group on the right side by placing a check beside the student(s) name(s), then click Add Users to Group.
7. (Optional) Reset the search as needed by clicking the Reset Search button. Then repeat steps 5-8 above.
8. Once you've added all your students to the group, click Save.
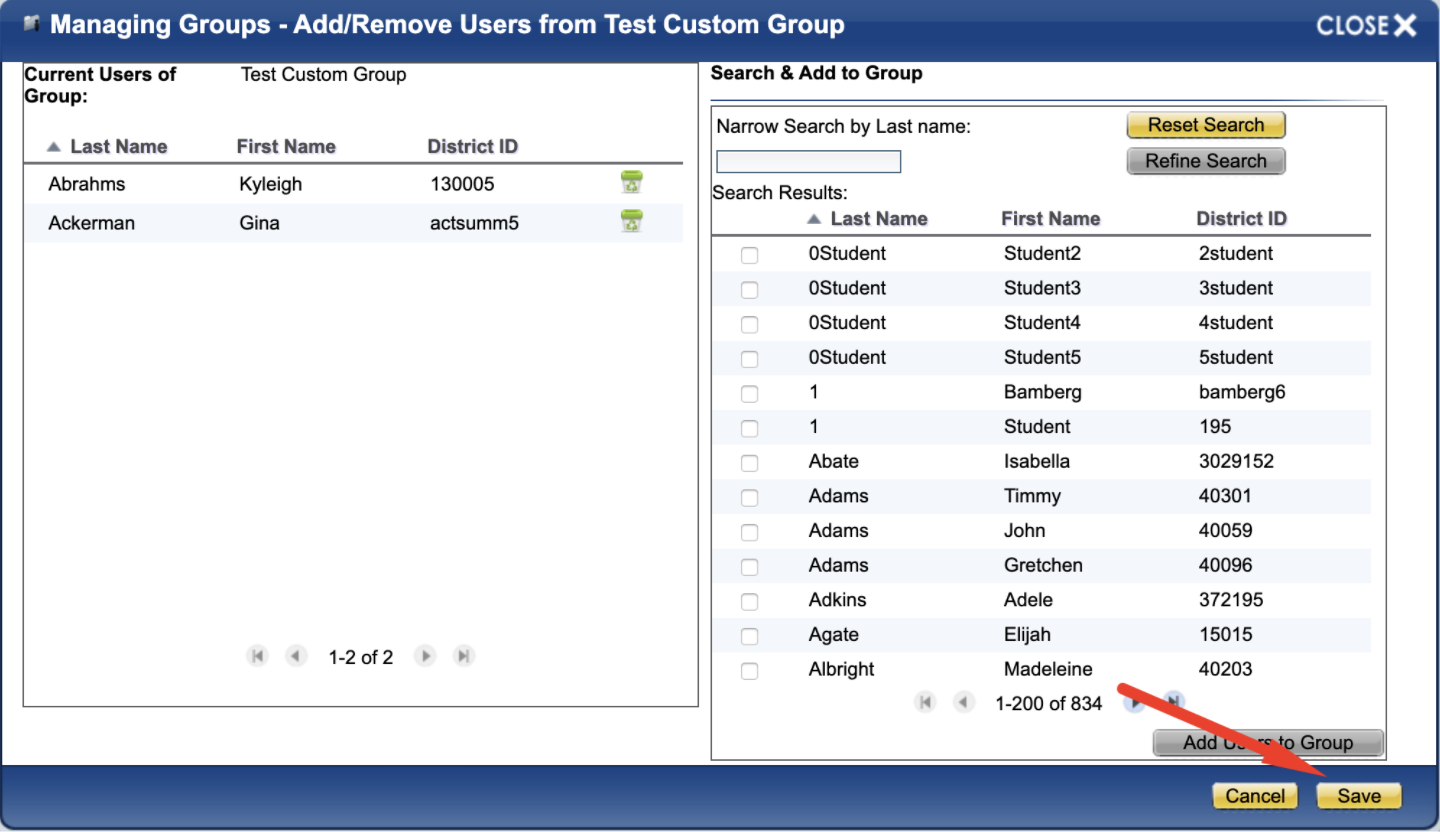
Note: To remove a user from the custom group - Hover your mouse over the user’s name; click on Remove.
Edit Custom Group Details
1. Optional:
From the Administration page > Groups sub-tab:
-
Expand the Custom Group section by clicking on the + symbol.
-
Click on the name of the custom group you wish to edit.
You can:
-
Change group name.
-
Add additional users to a group by clicking the Add/Remove button.
-
Remove users from a group by clicking the Add/Remove button.
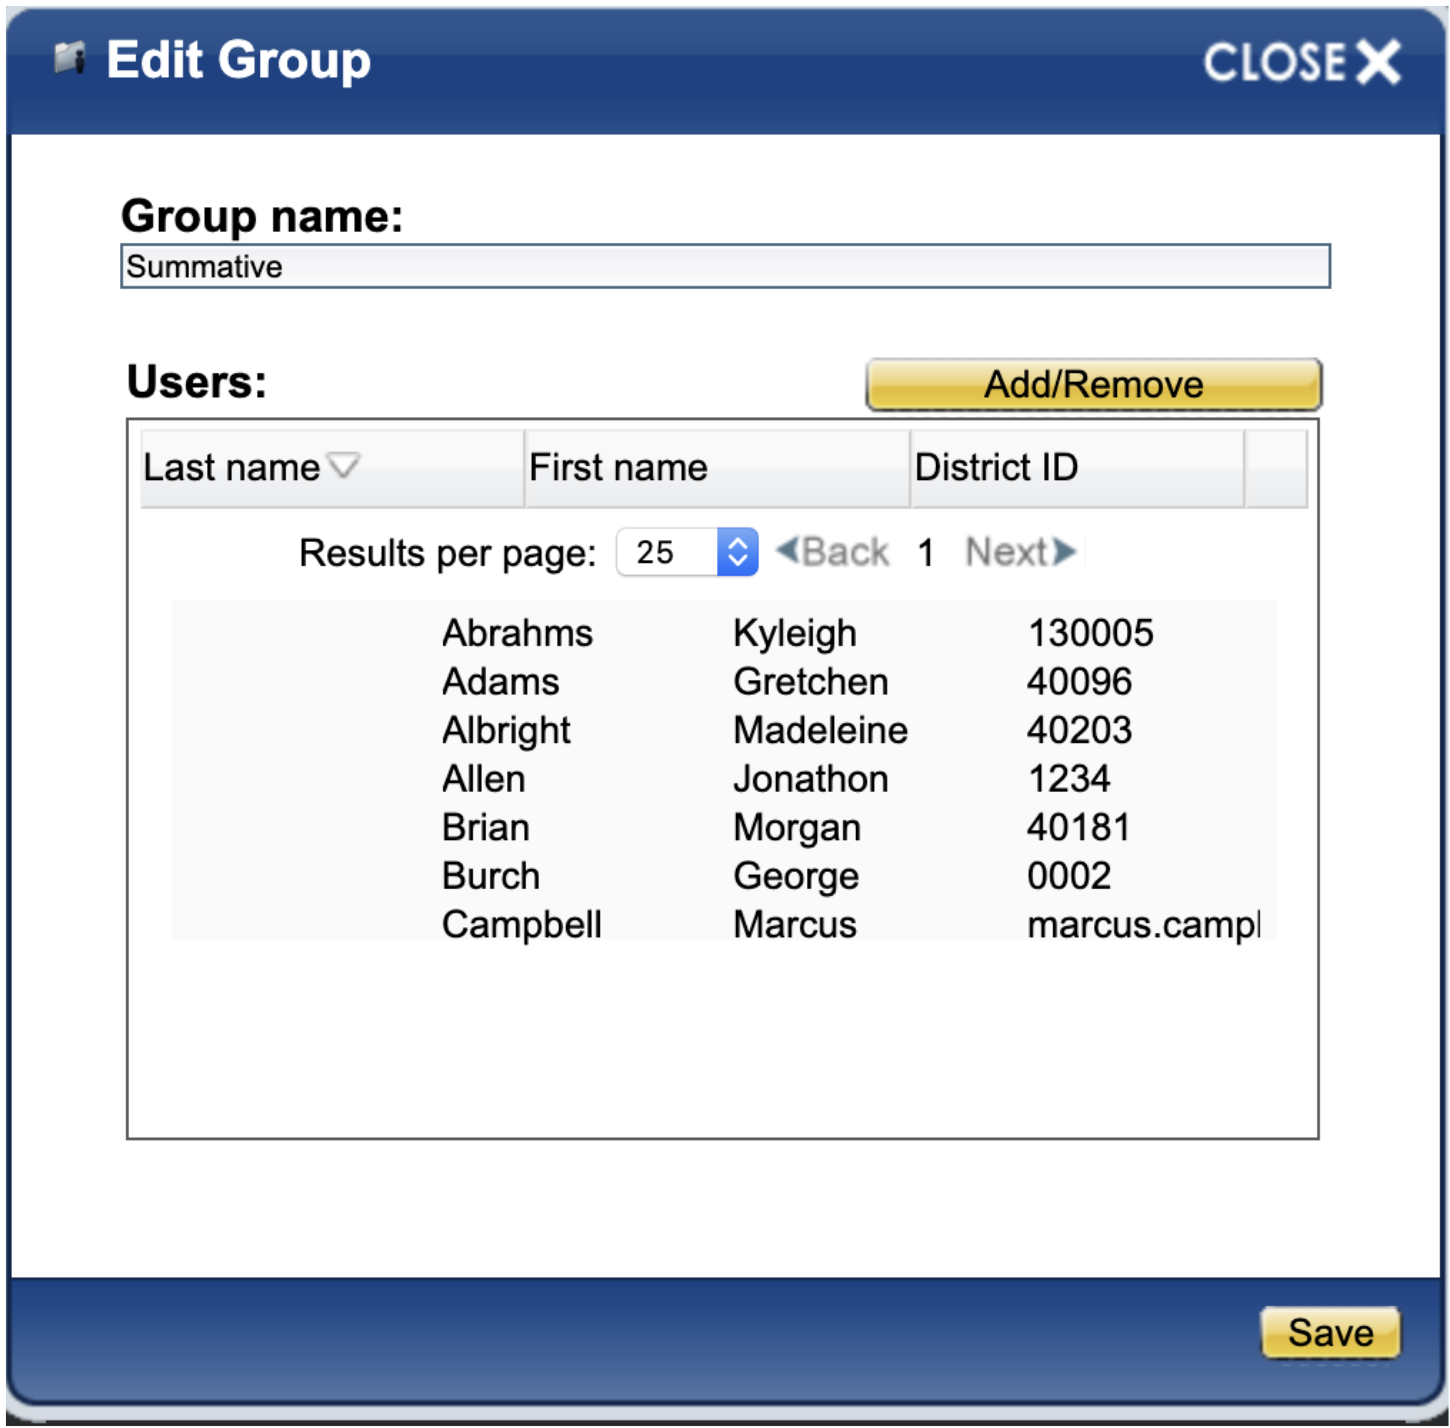
2. Click the Save button if changes were made.